Better iPhone Subway Photos Keep Motion, Reflections, and Real Light
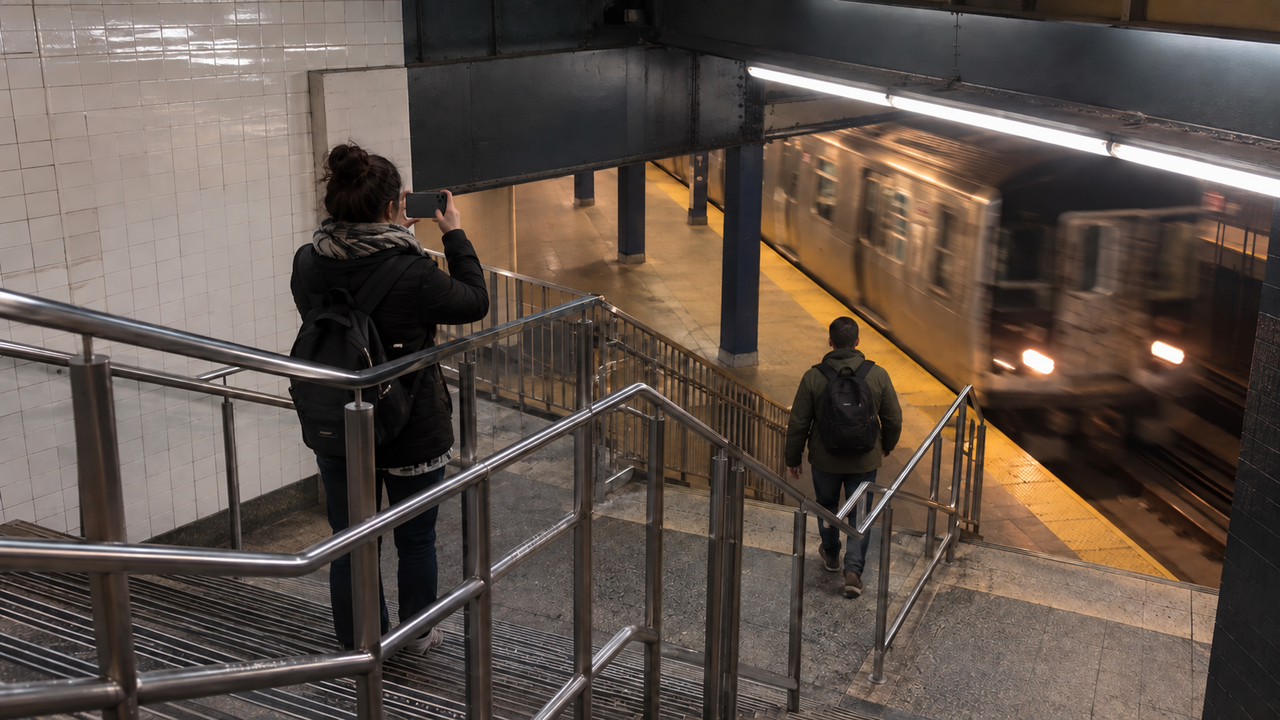
Natural subway photos work when one subject stays clear, motion feels intentional, reflections support the scene, and the original train or station light remains believable. The goal is not to brighten every shadow or force a vintage tint over the frame; it is to preserve the feeling of moving through the city while giving the eye one clear place to land.A subway car combines fast movement, reflective glass, narrow spaces, bright windows, overhead lighting, and people who rarely stay still. That sounds difficult, but it also gives iPhone photographers the raw material for photographs that feel alive. The same balance of subject, light, and setting that gives everyday iPhone photos more digital-camera characteris especially useful underground and on elevated trains.
Why do subway photos often look flat or chaotic?
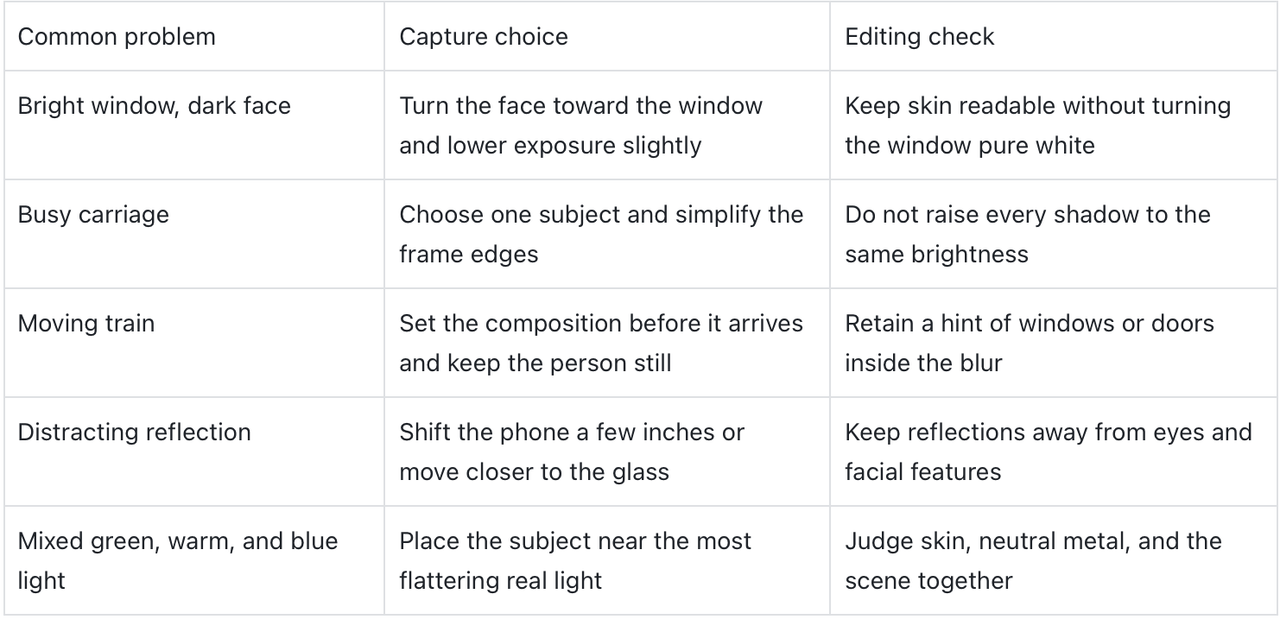
Subway photos usually feel chaotic because the frame contains too many equally strong elements: poles, doors, windows, passengers, advertisements, reflections, and motion. They feel flat when the phone lifts every part of the scene toward the same brightness, leaving no clear subject or sense of depth.Before taking the photo, decide what the picture is about in one short phrase: a friend by the window, a reflection in the door, a moving train behind a still person, or the geometry of an empty car. Then remove or weaken anything that competes with that idea. A small step to the side can hide a bright sign behind a pole, move a face away from a door seam, or separate a person from a busy background.Keep the edges of the frame under control. Half a face, a cut-off hand, or a bright object touching the border can pull attention away from the subject. On public transit, a clean edge often matters more than a perfectly centered composition.
Decide what should move and what should stay sharp
A convincing transit photo usually needs one stable visual anchor. If the train or city outside is moving, keep the person, seat, pole, or window frame clear. If a walking passenger is the subject, let the carriage structure remain steady so the motion has context.
When the city is moving outside the window
Hold the phone close to your body, keep both hands on it, and lean your elbows lightly against your torso. Tap the person or object that must remain clear, then take a short sequence as the view outside changes. One frame may place the blur behind the subject more cleanly than the others.Do not chase a completely frozen exterior. A little horizontal blur can show that the train is moving and make a quiet portrait feel connected to the city. The key is separation: the subject should not blur in the same direction unless that is the point of the photograph.
When a train is moving behind a person
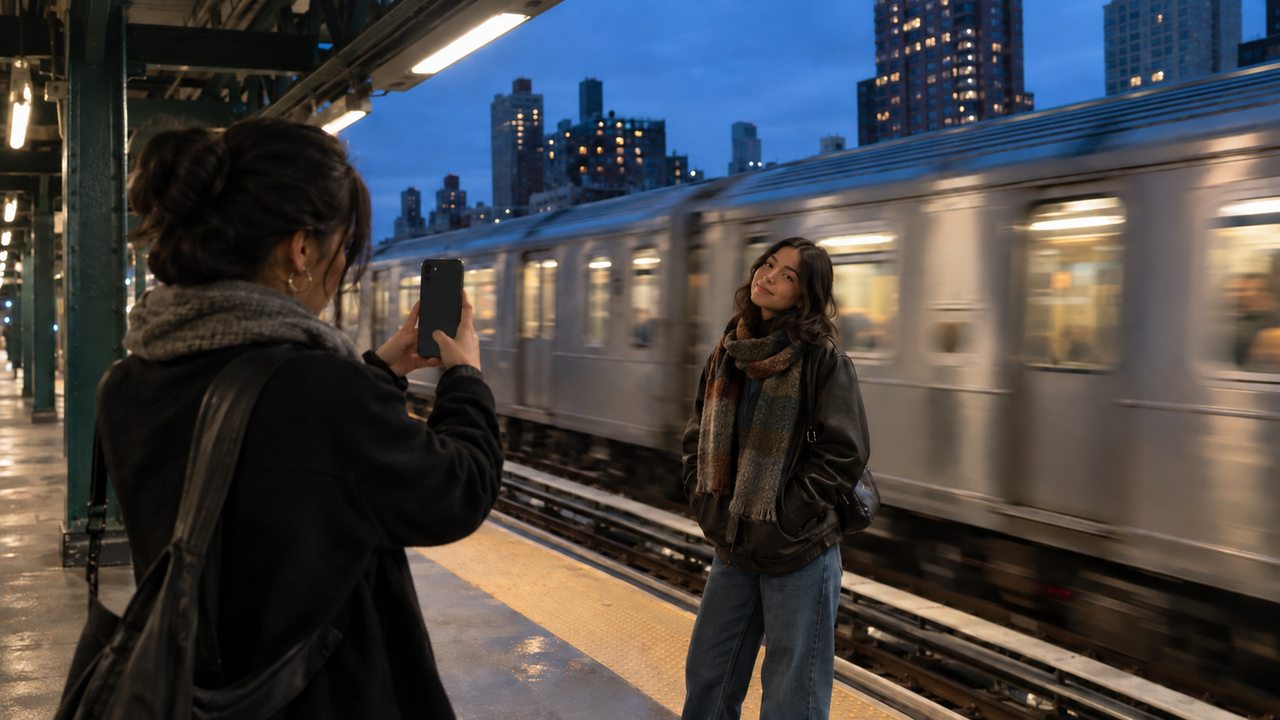
Stand well behind the platform edge, choose your framing before the train arrives, and ask the subject to hold still for a moment. Use a column, railing, or the platform geometry as a steady visual reference. Take the photo only from a safe position; a stronger image is never worth stepping close to the tracks.The moving train can fill the background without becoming a featureless streak. Wait for the speed, light, and distance that leave a hint of windows or doors. That small amount of structure keeps the motion readable.
How do you expose a face beside a bright train window?
Expose for the face while protecting the brightest useful part of the window. Tap the face on the iPhone screen, then lower the exposure slightly if the exterior has turned into a blank white patch. A darker coat or seat can stay dark; the window does not need to reveal every building, but it should keep enough tone to feel like a real place.Ask the subject to turn slightly toward the window instead of facing straight into the car. Side light gives the face shape and lets the darker side connect naturally with the interior. If the sun is harsh, move one seat farther from the window or wait until the train changes direction. Small changes in position are more effective than trying to rebuild skin and sky later.Check the face at normal viewing size before zooming in. If the expression reads clearly and the skin still looks believable, minor shadow is not a problem. Lifting every dark area can remove the atmosphere that made the scene worth photographing.
Use reflections as a second layer, not extra clutter
A useful reflection repeats or expands the main idea. It might show part of the subject's profile, echo the passing buildings, or connect the inside of the train with the city outside. If the reflection creates a second competing face or a bright shape across someone's eyes, change your angle.Clean the phone lens first, and if possible choose a cleaner area of the train window. Move the phone a few inches left, right, up, or down while watching how the reflection shifts. Bringing the lens closer to the glass can reduce some interior reflections, but do not press the phone against a dirty or vibrating surface.Dark clothing can also help by reflecting less light back into the window. The goal is not to eliminate every reflection. A faint carriage reflection can make the photo feel layered and immediate; it simply should not hide the subject.
Build the composition from the subway's fixed lines
Doors, poles, seat backs, and window frames give you a ready-made structure. Use one of them as the main vertical or horizontal line, then place the subject beside it rather than allowing the line to cut through a face.Inside the car, start with the standard lens before reaching for an ultra-wide view. A very wide perspective can stretch faces and limbs near the edge of the frame. If space allows, step back slightly and keep people away from the outer corners. Include enough of the carriage to explain the moment, but not so much that the subject disappears.On a platform, look for three layers: a foreground edge or column, the person, and the train or skyline behind them. This creates depth without requiring heavy background blur. For more city-photo ideas built around light, geometry, and atmosphere, see WayShot's guide to moody street photography on mobile.
Keep fluorescent light, daylight, and skin color believable
Mixed transit light looks natural when no single color dominates the whole frame. Overhead lights may lean green or warm, while a window or station entrance may look cool. Preserve that difference instead of making the entire photo orange, blue, or gray.Use skin as the editing checkpoint. If a person's face turns more orange than the platform lights, too magenta under fluorescent light, or strangely pale beside a blue window, the treatment is too strong. Next, check neutral references such as a white shirt, gray pole, or stainless-steel door. They do not need to be perfectly neutral, but they should still look plausible within the scene.Finally, check the darkest areas. Transit photos need some darkness to retain place and mood. The practical goal is visible separation between the subject and the background, not detail in every corner. WayShot's guide to making photos look better without looking over-edited offers the same useful principle: stop when the image reads more clearly but still feels like the original moment.
Where does WayShot fit into a transit photo workflow?
WayShot is most useful after the basic scene already works. You can choose a Style while shooting when you know the visual direction you want, or apply a Style to a photo from your library after the ride. The current WayShot iPhone app listing describes both camera capture and photo-library editing, so either workflow can fit a fast commute.For capture, choose the Style before the moment becomes busy, then focus on timing, subject placement, and exposure. For an existing photo, first choose the frame with the clearest expression and most useful motion; apply a Style only after that selection. Style should organize the color and mood, not become the subject of the image.Compare the result with the original at normal viewing size. Keep it if the subject separates more clearly, the motion still feels natural, and the train light remains recognizable. Reconsider it if skin changes identity, reflections become harsher, or the city atmosphere disappears behind a uniform color cast.
What can a Style not fix?
A Style cannot repair severe blur, missed focus, complete overexposure, or detail that the camera never recorded. It also cannot correct a reflection that fully covers a face or restore a subject lost outside the frame. Those problems must be prevented during capture or solved by choosing a different photo.This boundary is useful, not limiting. It keeps the workflow honest: stabilize the phone, protect the important highlight, focus on the subject, and simplify the composition first. Use Style only when the underlying photograph already contains the moment you want to keep.
The strongest subway photos still feel like the ride
A polished transit photo should not erase the train. Keep enough motion to suggest travel, enough reflection to show layers, and enough mixed light to preserve the real atmosphere. When the subject is clear and the setting remains recognizable, the photograph can feel intentional without losing the everyday energy that made you lift the phone.
Frequently Asked Questions
How do I take a clear iPhone photo inside a moving subway car?
Hold the phone with both hands, keep your elbows close to your body, tap the main subject to focus, and take a short sequence. Let the exterior blur if it helps show motion, but keep the subject or carriage structure clear.
Should I use the ultra-wide lens for subway photos?
Use the standard lens first when people are near the edges of the frame. Ultra-wide views can stretch faces and limbs, so they work better when the scene is the subject and people are kept away from the corners.
How do I photograph someone beside a bright train window?
Turn the person's face slightly toward the window, tap the face to set focus and exposure, and lower exposure a little if the exterior becomes blank white. Preserve believable skin and enough window tone to show the setting.
Are reflections bad in subway photography?
No. A reflection can add depth when it repeats the subject or connects the carriage with the city. Change your angle if it crosses the eyes, creates a competing face, or hides the main subject.
Can WayShot apply a Style to a subway photo I already took?
Yes. WayShot can apply a Style to a photo from your iPhone library, and it also lets you choose a Style while shooting. Start with the clearest frame, then judge whether the Style preserves skin, motion, and the original transit light.
Can a Style fix a blurry or overexposed subway photo?
No. A Style cannot recover severe motion blur, missed focus, complete overexposure, or detail that was never recorded. Capture stability, focus, exposure, and composition must be handled before styling.
Used Links
- Anchor text: everyday iPhone photos more digital-camera character Destination URL: https://www.wayshot.ai/blog/wayshot-gives-everyday-iphone-photos-a-more-digital-camera-look
- Anchor text: moody street photography on mobile Destination URL: https://www.wayshot.ai/blog/authentic-vintage-film-moody-street-photograph
- Anchor text: photos look better without looking over-edited Destination URL: https://www.wayshot.ai/blog/how-to-make-your-photos-look-better-without-looking-over-edited
- Anchor text: WayShot iPhone app listing Destination URL: https://apps.apple.com/us/app/wayshot-aesthetic-photo-editor/id6749303003