Best Way to Use a Vintage Style on iPhone: Before or After?
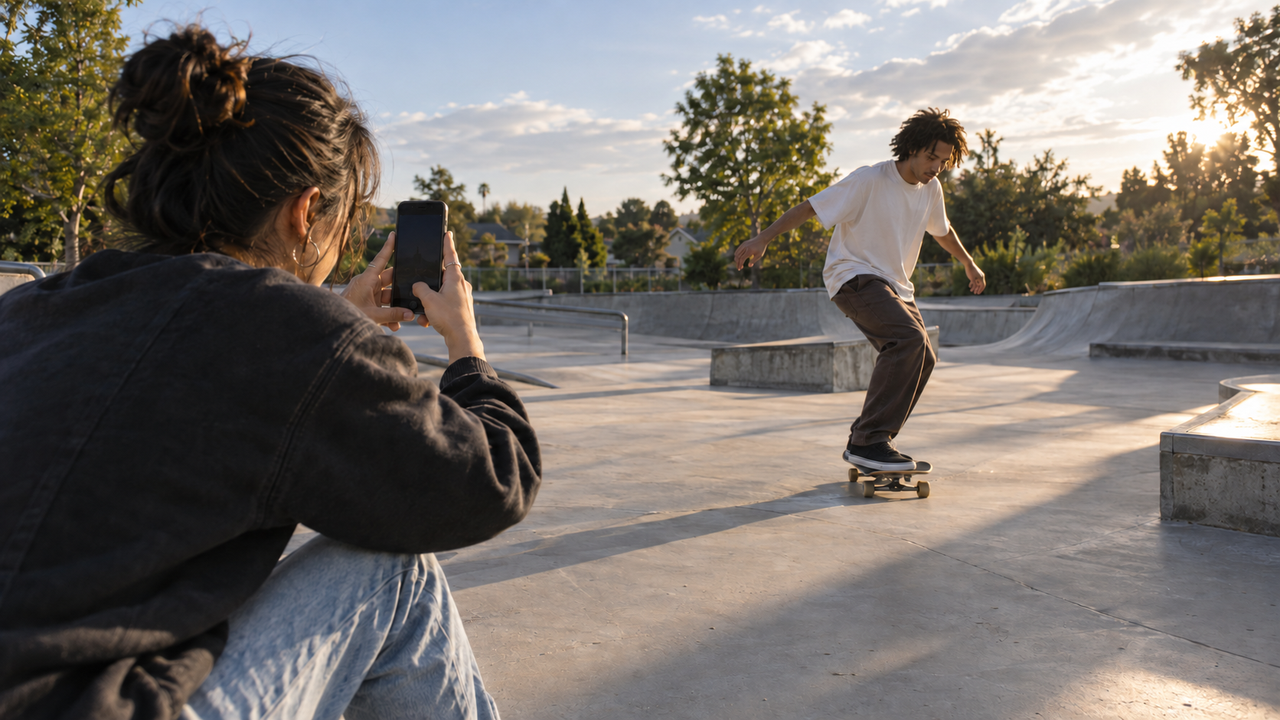
Choose a vintage Style before taking an iPhone photo when the look should guide your lighting, framing, and timing. Apply a Style afterward when the moment is unpredictable, you want to select the strongest frame first, or the photo already exists in your library. The better workflow is the one that protects the moment while keeping the final color, contrast, and texture believable.
The quick answer
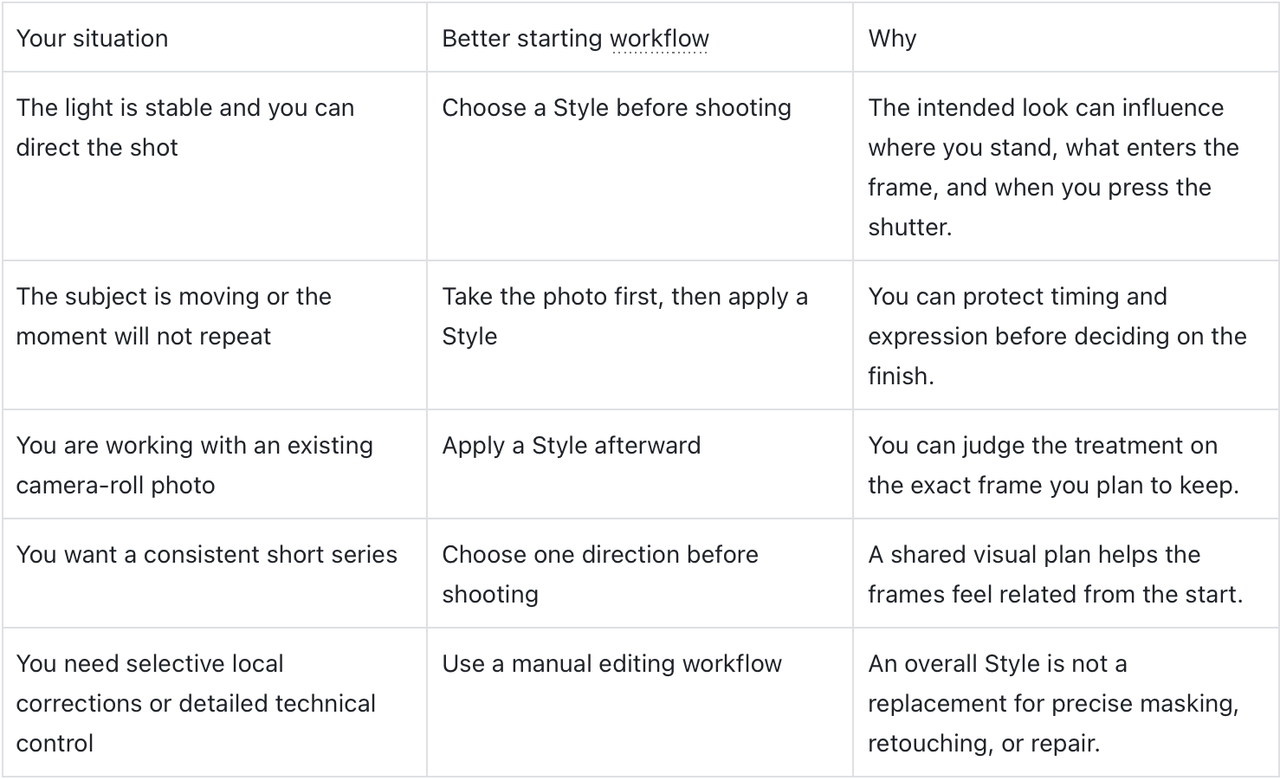
There is no universal winner. Choosing before the shutter is faster and more intentional; choosing afterward is more flexible. In either case, exposure, focus, subject movement, and composition still have to work at capture.
What should you look for in a vintage camera workflow?
A useful vintage workflow should fit the way you actually take photos, not simply offer the longest list of effects. Start with five practical questions.
Can you choose the visual direction before the shutter?
This matters when the look changes how you compose the scene. A stronger flash-led direction may suit a close night portrait, while a lighter daylight direction may leave more room for the surroundings. If seeing the treatment before capture is important to you, confirm how the in-camera view relates to the saved result rather than assuming every app handles preview the same way.
Can you use the same Style on a photo from your library?
Library support matters for candid moments, moving subjects, older photos, and any situation where getting the frame is more important than choosing a look in advance. It also lets you compare a treatment with the original before committing to it.
Does the Style shape the whole scene or only add decoration?
A believable treatment should make color, contrast, white balance, highlights, shadows, and texture feel related. Grain, date stamps, light leaks, and borders can be intentional creative choices, but they do not automatically make a photo feel like it came from a compact digital camera or film camera.
Can you change direction when the light changes?
A single treatment will not suit bright daylight, window light, mixed indoor light, and direct flash equally well. The practical question is whether you can choose a different visual direction for the scene in front of you. WayShot's guide to choosing Styles for different kinds of photos explains why the scene should come before the Style name.
Do you want fast direction or detailed manual control?
A Style-based workflow is useful when you want an overall visual decision without building an edit one adjustment at a time. It is less suitable when you need to change one small area, match exact commercial color, remove a complex distraction, or retouch individual details. Decide which problem you are solving before judging the tool.
What makes an iPhone photo look convincingly vintage?
A convincing vintage or digicam-inspired photo has a coherent relationship between light, color, contrast, clarity, and texture. It does not need to imitate an exact camera, sensor, lens, or film stock. It needs to make the scene feel internally consistent.Start with the light. Direct flash can create a bright subject, darker background, harder shadow, and immediate snapshot energy. Soft daylight calls for a gentler response. Mixed indoor light may need restraint so that skin does not become orange while windows turn unnaturally blue.Then check tonal behavior. Older compact-camera character is often associated with firmer contrast and less perfectly recovered highlight and shadow detail than a heavily processed modern phone image. That does not mean crushing every shadow or blowing every bright area. Keep enough information to read the subject and setting.Finally, inspect color relationships and texture. Skin, clothing, sky, foliage, and practical lights should still belong to the same scene. Texture should support the photograph rather than sit on top of it like a sticker. For a deeper evaluation framework, see how to judge whether a digicam look remains convincing in real photos.
When should you choose a Style before taking the photo?
Choose a Style before shooting when you have enough time to make the look part of the photograph. This works especially well for a planned portrait, a still-life detail, a calm street scene, or a short set made under steady light.Use the selected direction as a decision aid:
- Check the brightest area. If a pale shirt, sky, or reflective surface loses all usable detail, reduce exposure or change your angle before shooting.
- Check skin separately from the background. A warm scene can still have believable skin; the whole frame does not need the same orange cast.
- Frame for the treatment. A flash-led look may benefit from a closer subject and a darker background. A softer daylight look can keep more environmental context.
- Keep the series small and consistent. If three or four images belong together, one visual direction can help them read as a set.
The limitation is commitment. If the light changes quickly or the subject moves into a different environment, the same Style may no longer fit. Reassess instead of forcing the original choice across the entire session.
When is it better to apply a Style after taking the photo?
Apply a Style afterward when timing, expression, or movement matters more than the finish in the moment. Capture the event first, select the clearest and most meaningful frame, then decide what visual direction supports it.This workflow is especially useful for children, pets, street moments, sports, parties, changing weather, and travel scenes. It is also the right route for photos already saved in your library. The advantage is comparison: you can judge the treatment on the exact photo instead of imagining how it might work.Review the original before styling. Reject frames with severe motion blur, missed focus, or fully blown highlights when a better frame exists. Then compare the treated image at normal viewing size and zoom in only where identity and detail matter: eyes, skin texture, hands, edges, signs, and small objects. WayShot's simple digicam-style editing workflow offers a compact way to review an existing photo without turning the process into a long adjustment session.
How does WayShot fit into both workflows?
WayShot is designed for people who want a clear overall visual direction with fewer editing decisions. You can choose a Style while shooting, or apply a Style to a photo from your library. The current WayShot iPhone listing on the US App Store describes both camera capture and library editing.That makes WayShot a practical fit when speed and scene-level consistency matter more than fine manual control. It is not the right tool for every job. If you need precise local adjustments, exact color matching, complex object removal, or detailed retouching, a manual editing workflow is more appropriate.A Style also cannot fix severe motion blur, missed focus, complete overexposure, or detail the camera never recorded. It can shape the overall look of a usable photograph; it cannot reconstruct a failed capture.
Frequently Asked Questions
Is it better to choose a vintage Style before or after taking an iPhone photo?
Choose before shooting when the look should guide the light, framing, and consistency of a planned photo. Apply a Style afterward when the moment is unpredictable, you want to select the best frame first, or the photo is already in your library.
Can WayShot apply a Style to an existing iPhone photo?
Yes. WayShot supports applying a Style to photos from your library as well as choosing a Style while shooting, according to its current US App Store listing.
What makes a vintage photo look believable instead of heavily filtered?
Believable vintage character comes from coherent light, color relationships, contrast, white balance, clarity, and texture. Decorative grain, date stamps, borders, or light leaks can support a look, but they cannot create credibility on their own.
Can a Style fix a blurry, out-of-focus, or overexposed photo?
No. A Style cannot restore severe motion blur, missed focus, completely overexposed areas, or detail that was never recorded. Choose a stronger source frame whenever possible.
Should every photo in a set use the same Style?
Use one visual direction when the photos share similar light and belong to the same story. If the light changes substantially, choose a better-fitting Style rather than forcing identical treatment across every frame.
Conclusion
Choose a Style before the shutter when it helps you make a more intentional photograph. Apply one afterward when protecting the moment and choosing the best frame come first. Whichever route you take, judge the result by the photograph itself: the subject should remain recognizable, the light should still make sense, and the vintage character should support the memory rather than cover it.